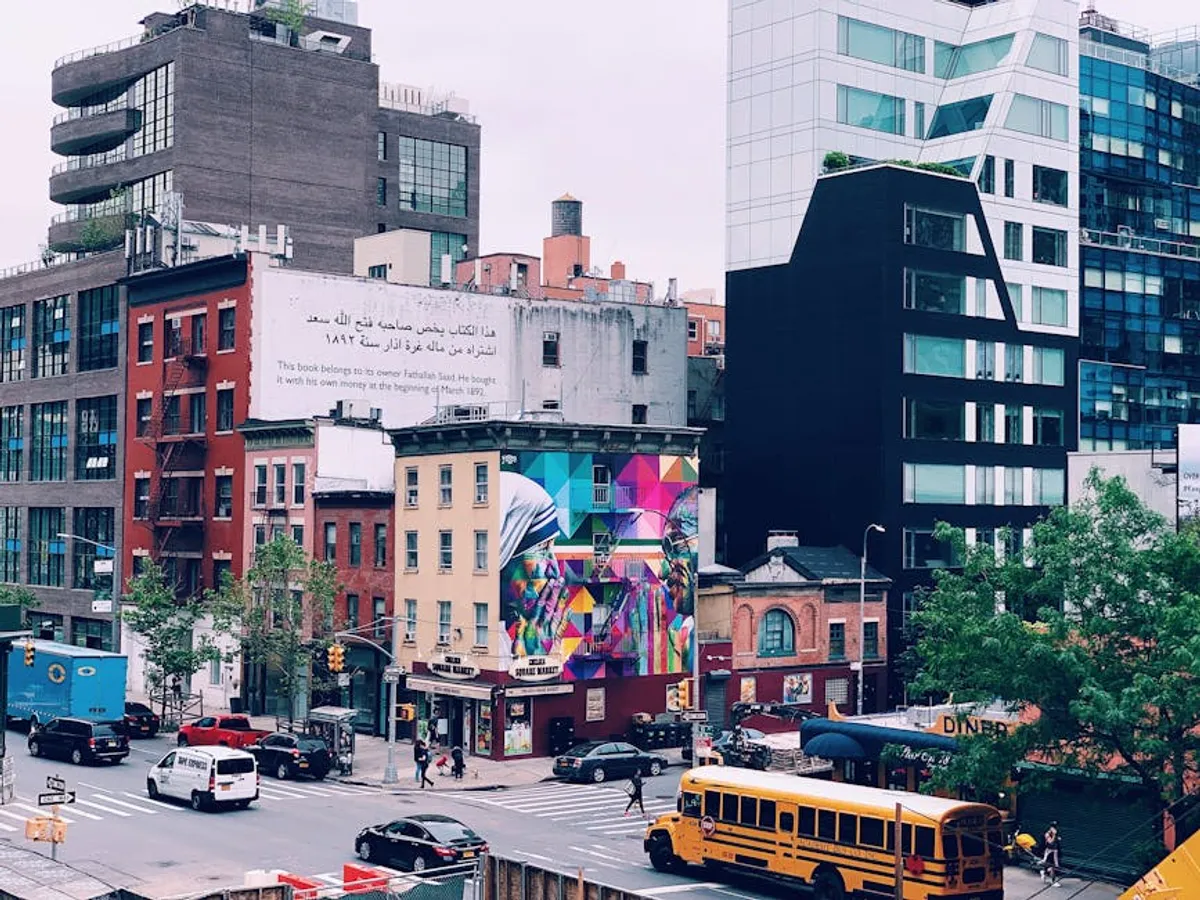
Photographing murals, installations, and street scenes presents unique challenges that extend beyond standard portraiture or landscape photography. These subjects often exist in dynamic, uncontrolled environments, demanding specific technical approaches and a keen eye for context. Whether documenting public art for a portfolio, capturing urban vibrancy for commercial use, or preserving ephemeral installations, success hinges on understanding how light, scale, and environment interact with your subject. This guide details practical strategies to overcome common obstacles, ensuring your images accurately convey the artist's intent and the scene's inherent energy.
Understanding Your Subject: Murals, Installations, and Street Art
Murals: Scale, Light, and Distortion
Murals, by their nature, are large-scale, fixed art pieces, typically on walls. Their size introduces immediate challenges: capturing the entire work without significant lens distortion and managing ambient light. Wide-angle lenses are often necessary, but they can introduce barrel distortion, making straight lines appear curved. Perspective distortion, where lines converge when shooting from a low angle, is also common. Effective mural photography requires careful positioning—ideally, shooting perpendicular to the wall from a distance that allows the entire mural to fit the frame without excessive wide-angle use. Light management is critical; harsh midday sun creates strong shadows and glare, obscuring details. Overcast days or the "golden hour" (shortly after sunrise or before sunset) provide softer, more even illumination, revealing the mural's true colors and textures. When direct sunlight is unavoidable, consider bracketing exposures to capture detail in both highlights and shadows, merging them in post-processing.
Installations: Context, Interaction, and Dimension
Installations are often three-dimensional and site-specific, designed to interact with their environment or viewers. Photographing them effectively means conveying their spatial relationship, scale, and the intended experience. Unlike murals, installations demand showing the work within its setting, often including elements of the surrounding architecture, natural landscape, or even human interaction. This requires stepping back to capture the broader context, then moving in for detail shots that highlight specific elements or textures. Pay attention to how light falls on the different planes of the installation, using it to emphasize depth and form. Multiple perspectives are crucial; shoot from eye level, from above, and from below to fully represent the work's dimensionality and its dialogue with the space.
Street Scenes: Candid Moments, Dynamic Composition, and Storytelling
Street scenes are inherently dynamic and unpredictable. The goal is often to capture candid moments, the flow of urban life, or the unique character of a place. This demands quick reflexes and an ability to anticipate action. Composition in street photography frequently relies on leading lines (roads, buildings, fences), framing (doorways, windows), and the rule of thirds to guide the viewer's eye. Incorporating human elements, even if blurred or in silhouette, adds a sense of scale and narrative. Look for juxtapositions, interesting light patterns, and moments of human connection or isolation. A fast prime lens (e.g., 35mm or 50mm equivalent) can be advantageous here, offering excellent low-light performance and shallow depth of field to isolate subjects while maintaining a natural perspective.
Essential Gear Considerations
Lenses for Different Scenarios
Your lens choice significantly impacts the final image. For large murals and expansive installations, a wide-angle lens (16-35mm equivalent) is often necessary to fit the entire subject into the frame. However, be mindful of distortion. For capturing details or isolating specific elements within a busy street scene, a standard prime lens (35mm or 50mm equivalent) offers sharpness, excellent low-light capability, and a natural field of view. A short telephoto lens (85mm or 105mm equivalent) can be useful for compressing perspective, isolating subjects from backgrounds, or capturing candid moments from a distance without intruding.
Tripods and Stabilization
While often impractical for fast-paced street photography, a sturdy tripod is indispensable for murals and installations, especially in low light or when precise composition and perspective correction are paramount. It allows for slower shutter speeds, lower ISO settings (reducing noise), and careful framing. For bracketing exposures or creating panoramic stitches of large murals, a tripod ensures consistent alignment. For handheld shooting in dynamic environments, cameras with in-body image stabilization (IBIS) or lenses with optical stabilization can significantly reduce blur from camera shake.
Lighting Modifiers and Reflectors (Limited Use)
For large-scale public art, external lighting modifiers like softboxes or large reflectors are generally impractical due to size and power requirements. However, a small, collapsible reflector can be useful for bouncing ambient light onto shadowed areas of smaller installations or street art pieces, particularly when shooting details. For night photography of street scenes, a small, off-camera flash with a diffuser can be used subtly to highlight subjects without overpowering the natural ambient light, preserving the mood of the scene.
Mastering Light and Composition
Optimal Lighting Conditions
The "golden hour" provides soft, warm, directional light that enhances textures and colors, ideal for murals and installations. Overcast days offer diffuse, even light, eliminating harsh shadows and glare, which is excellent for detailed documentation. Avoid shooting in harsh midday sun whenever possible, as it creates strong, unflattering shadows and can blow out highlights. For night scenes, utilize existing artificial light sources—streetlights, neon signs, building illumination—to create dramatic compositions and capture the unique atmosphere. Experiment with long exposures to blur motion and create light trails.
Perspective and Angle Choices
For murals and architectural installations, shooting straight on and level with the artwork minimizes perspective distortion. If shooting from a low angle is unavoidable, plan to correct converging vertical lines in post-processing. Experiment with different angles: a slightly elevated position can provide an overview of an installation, while a very low angle can make a subject appear more imposing. In street scenes, varying your height and angle can yield vastly different results, from eye-level candid shots to overhead views capturing patterns of movement.
Incorporating Context and Scale
To convey the true nature of murals and installations, include elements that provide context and a sense of scale. This might mean incorporating surrounding architecture, natural elements, or even people interacting with the art (with permission, if identifiable). For street scenes, context is often inherent, but consider how background elements contribute to or detract from your main subject. Use depth of field to either isolate your subject (shallow DOF) or show it fully integrated into its environment (deep DOF).
Pro Tip: Before photographing public art, especially murals or installations, research the artist and work if possible. Understanding the artist's intent can guide your photographic approach, helping you capture the most impactful aspects. Also, be mindful of property rights and public access; some works may have specific guidelines or require permission for commercial use.
Post-Processing for Impact
Correcting Distortion and Perspective
Post-processing software offers powerful tools for correcting lens and perspective distortions. Lens correction profiles can automatically fix barrel or pincushion distortion. For converging lines, use the transform tools to adjust vertical and horizontal perspectives, making walls appear straight and perpendicular. This is particularly crucial for murals where geometric accuracy is often desired.
Color Grading and Tonal Adjustments
Enhance the visual impact of your images through careful color grading and tonal adjustments. Adjust white balance to accurately represent the colors of the artwork or the mood of the street scene. Use curves and levels to fine-tune contrast and dynamic range, ensuring details are visible in both highlights and shadows. Vibrancy and saturation sliders can boost colors without making them appear artificial, especially useful for vibrant street art.
Detail Enhancement and Sharpening
Sharpening can bring out the fine details and textures in murals and installations, but use it judiciously to avoid introducing artifacts. Apply local adjustments to specific areas that require more clarity. Noise reduction is also important, especially for images shot in low light, to maintain a clean, professional look.
Elevating Your Visual Storytelling
Successful photography of murals, installations, and street scenes blends technical proficiency with an understanding of the subject's unique demands. Consider these points:
- Scout locations: Understand the environment, light patterns, and potential obstacles before you shoot.
- Vary your shots: Capture wide, medium, and tight shots to tell a complete story.
- Anticipate moments: For street scenes, predict where action might occur and be ready.
- Respect the art and environment: Avoid disturbing the artwork or obstructing public spaces.
- Practice ethical considerations: Be aware of privacy, especially when photographing identifiable individuals without explicit consent.
- Experiment: Don't be afraid to try different angles, compositions, and lighting approaches.
By applying these strategies, you move beyond simple documentation to create compelling visual narratives that capture the essence and impact of these dynamic art forms.
Frequently Asked Questions
What is the best time of day to photograph murals?
The "golden hour" (shortly after sunrise or before sunset) provides soft, warm, directional light that enhances textures and colors. Overcast days also offer excellent diffuse, even lighting that minimizes harsh shadows and glare.
How do I avoid distortion when photographing large murals?
Shoot as straight on and perpendicular to the mural as possible. Use a standard or short telephoto lens if distance allows to minimize wide-angle distortion. If a wide-angle is necessary, correct barrel distortion and converging lines in post-processing software.
Is it ethical to photograph people in street scenes without their permission?
In most public spaces, photographing people for non-commercial purposes is generally permissible. However, for commercial use or if individuals are clearly identifiable, seeking permission is recommended to avoid privacy concerns and ensure ethical practice. Always be respectful and discreet.